Authentication and Authorization

Before you can interact with our APIs, your client application needs to get authenticated and authorized.

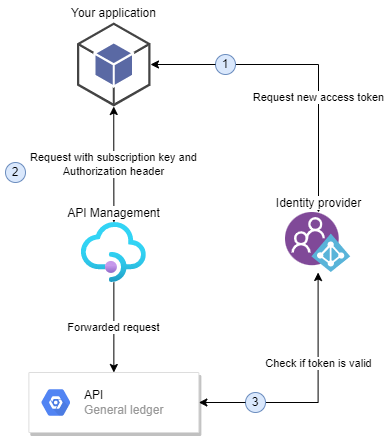
Our Public APIs contains two security layers, API Management and second is our Identity provider. All of your requests will be validated with both of the security mechanisms.

Basic flow for all API requests

1. Your application needs to request new access token from our Identity provider with given client credentials.
2. Your application will send the request to the API and the request contains two mandatory headers: OCP-APIM-SUBSCRIPTION-KEY and Authorization.

The subscription-key is a identifier for your application and you can request new subscription-key from our integration support.

3. Then your request is going to be validated first by API Management and the subscription will be checked, then the API Itself will check from the identity provider that the access token is valid. If everything is OK, then the request will be processed.

Picture

What do I need to get Started?

You need to get in contact with our Integration services support and ask for

Client credentials: Contains client identifier and client secret. This is used in our Client Credentials Oauth2 flow to validate and authorize your requests in the backend API.
Subscription-key: Fixed identifier for your client application. This will be send in the request's OCP-APIM-SUBSCRIPTION-KEY header
When contacting our support engineers, please provide at least these details:

Your name: 
Email address:
Phone number:
Application / Software name:
List of APIs you are interested:
Purpose of integration:
Picture

Example with PowerShell

Below is simple example with PowerShell to make your first request

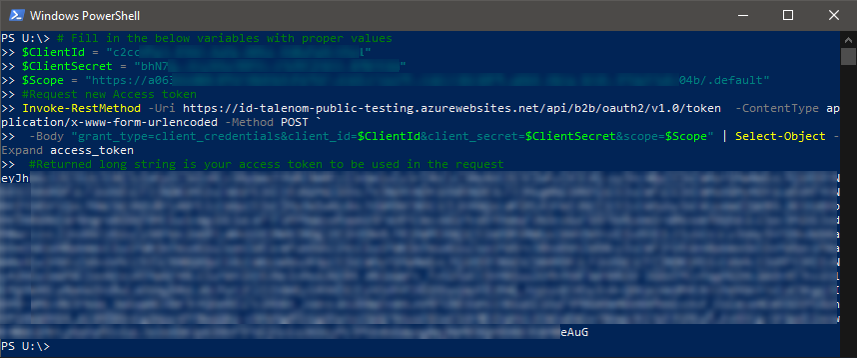
Request new access token

First you will need to request new access token from our identity provider

Picture

Try-it-yourself code snippet

If you want to try this out and you have working credentials, you can copy-and-paste below code into your PowerShell window and just replace the REPLACE-ME-WITH- -parts with proper values and then hit Enter. Please note that your client needs to have access to the API.

P# Fill ALL the below parameters with proper values
$ClientId = "REPLACE-ME-WITH-CLIENT-ID"
$ClientSecret = "REPLACE-ME-WITH-CLIENT-SECRET"
$OcpApimSubscriptionKey = "REPLACE-ME-WITH-SUBSCRIPTION-KEY"
$Scope = "REPLACE-ME-WITH-SCOPE"
$OrganizationNumber = REPLACE-ME-WITH-ORGANIZATION-NUMBER(NO NEED FOR QUOTES)
# Request new Access token. No need for changing anything below
echo "Requesting access token from identity provider"
$access_token = Invoke-RestMethod -Uri https://id.talenom.com/api/b2b/oauth2/v1.0/token -ContentType application/x-www-form-urlencoded -Method POST `
-Body "grant_type=client_credentials&client_id=$ClientId&client_secret=$ClientSecret&scope=$Scope" -Verbose | Select-Object -Expand access_token
echo "This is your access token: " $access_token
pause "Move on to next phase to make the actual request to the API"
# ApiUrl is the actual url to make the GET request. In this example we will call organization-api and get accounting periods for the organization assigned in the parameters.
$ApiUrl = 'https://apim.talenom.fi/organization/v2/accounting-periods/'+ $OrganizationNumber +'?pageIndex=0&pageSize=10&includeBookkeepingPeriods=false'
$Headers = @{
'Authorization' = "Bearer " + $access_token
'Content-Type' = 'application/json'
'Ocp-Apim-Subscription-Key' = $OcpApimSubscriptionKey
}
# Making the request into API
Invoke-RestMethod -Uri $ApiUrl -Method GET -Headers $Headers -Verbose

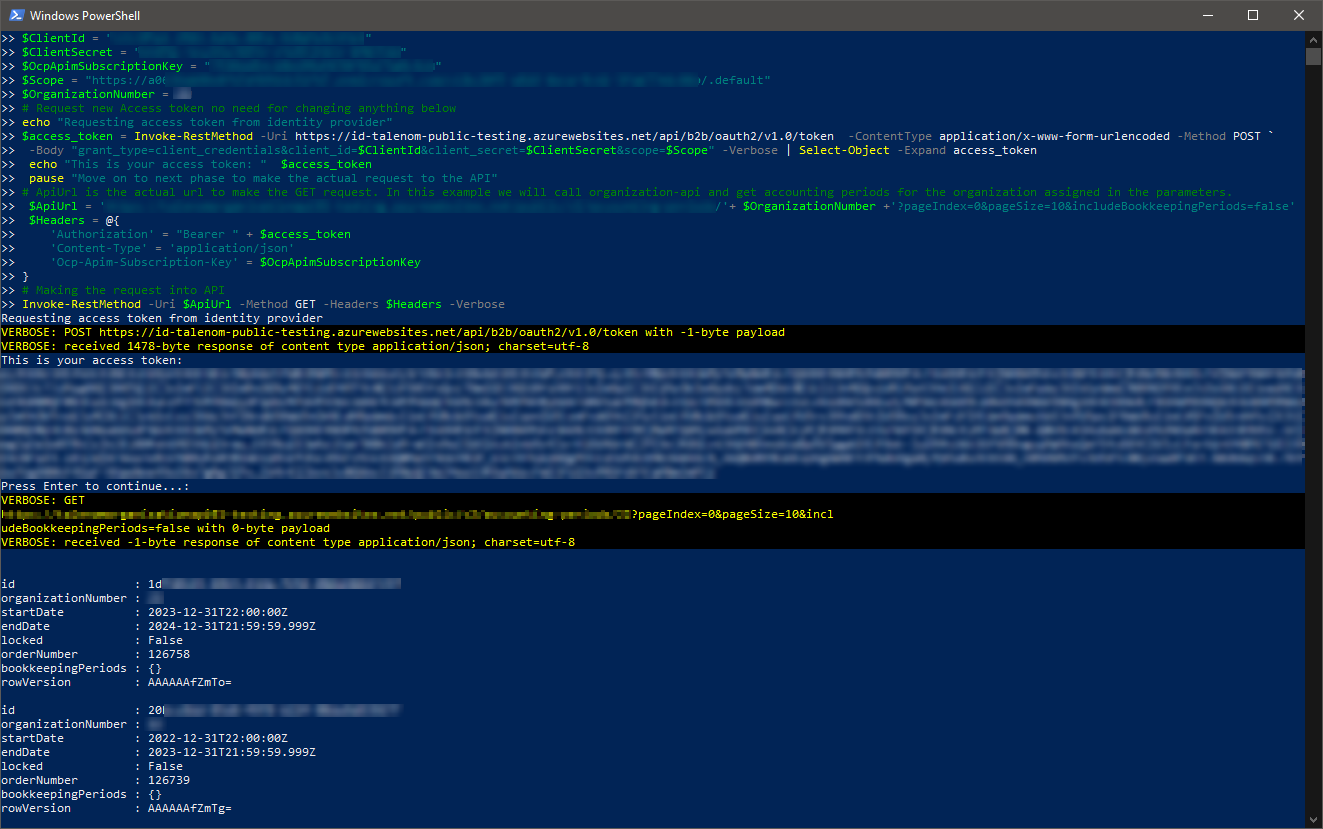
If everything went well, then your PowerShell window should look something like this

Picture

Congratulations, you just made your first request!

Using the script in this developer portal

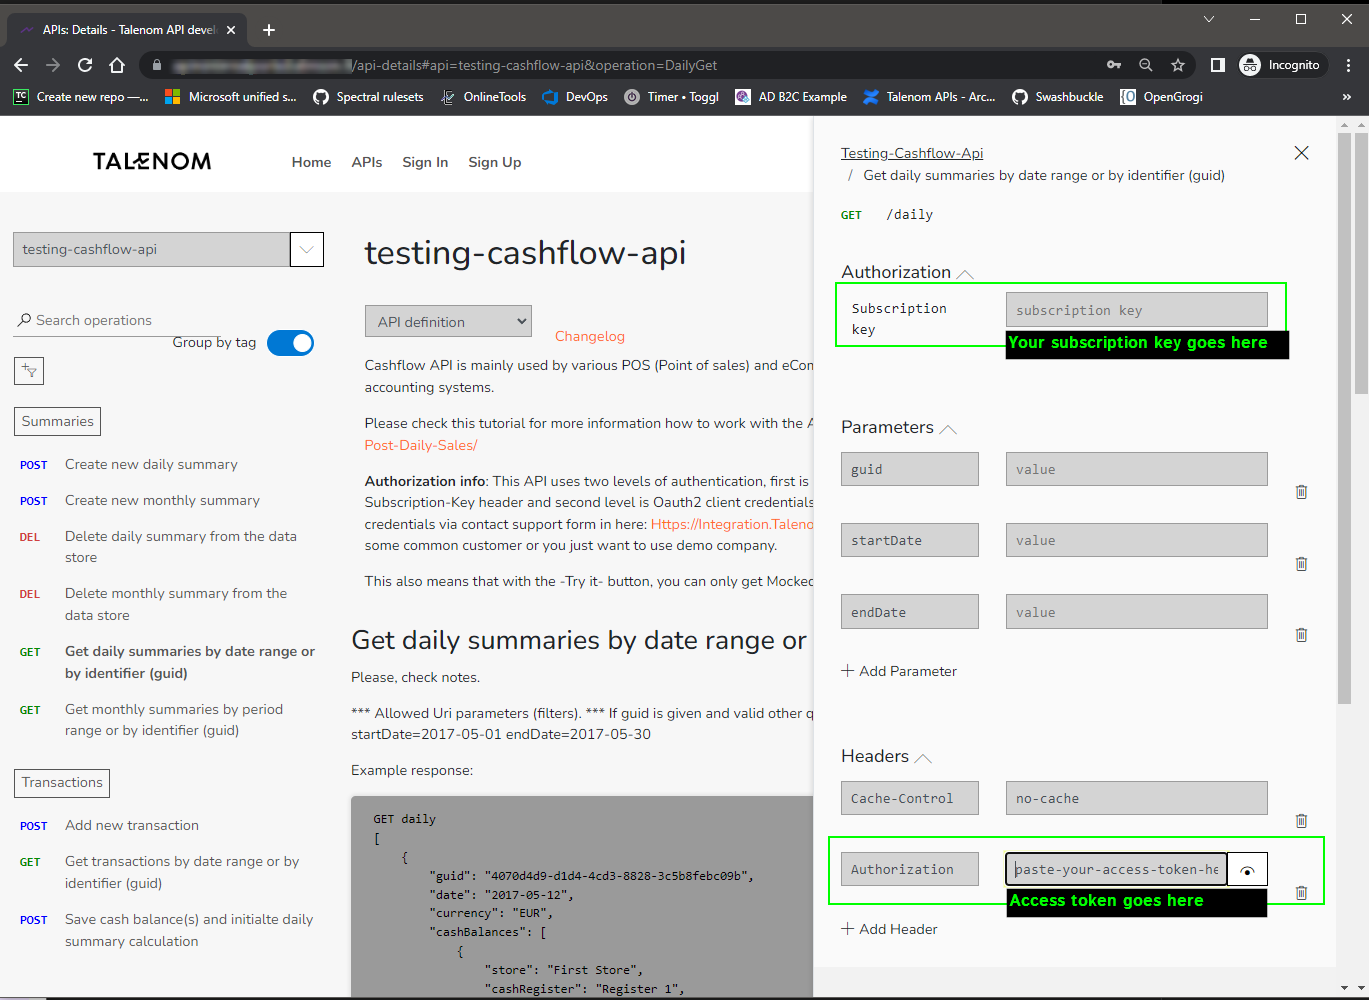
The authentication part of the PowerShell script might get handy in this developer portal as well. If you have signed up and you want to use the "Try it" feature within the portal's APIs, you will need to submit the Subscription key and Authorization header with working access token also in those requests.

Below is cleaned up script to get only the Access token. Again, just fill in the highlighted parameters with correct values, copy the script in the PowerShell window and hit enter. The script also copies the access token to your clipboard, so you can just paste it to the Authorization header.

# Fill ALL the below parameters with proper values
$ClientId = "REPLACE-ME-WITH-CLIENT-ID"
$ClientSecret = "REPLACE-ME-WITH-CLIENT-SECRET"
$Scope = "REPLACE-ME-WITH-SCOPE"
# Request new Access token no need for changing anything below
echo "Requesting access token from identity provider"
$access_token = Invoke-RestMethod -Uri https://id.talenom.com/api/b2b/oauth2/v1.0/token -ContentType application/x-www-form-urlencoded -Method POST `
-Body "grant_type=client_credentials&client_id=$ClientId&client_secret=$ClientSecret&scope=$Scope" -Verbose | Select-Object -Expand access_token
$token_value = "Bearer " + $access_token
Set-Clipboard -Value $token_value
echo "This is your access token: " $token_value
Write-Host "The access token is also copied to your clipboard so you can just ctrl+v it to your requests" -ForegroundColor Green


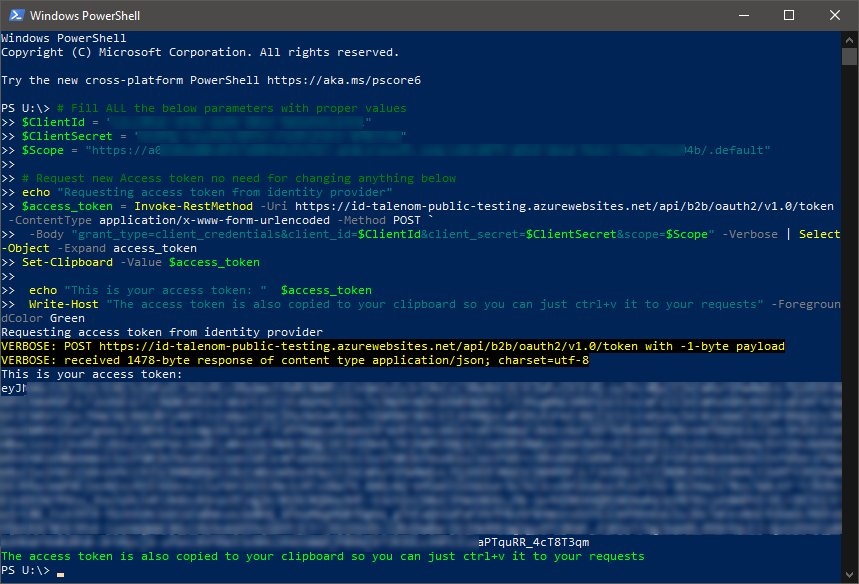
After running the script, your PowerShell window should look something like this

Picture

Same, but in Python

Here is the same example as above, but in Python. You may need to install the required modules (pip install requests and pip install pyperclip) before running this script.

import requests
import pyperclip
# Fill ALL the below parameters with proper values
client_id = "REPLACE-ME-WITH-CLIENT-ID"
client_secret = "REPLACE-ME-WITH-CLIENT-SECRET"
scope = "REPLACE-ME-WITH-SCOPE"
# Request new Access token no need for changing anything below
print("Requesting access token from identity provider")
url = "https://id.talenom.com/api/b2b/oauth2/v1.0/token"
payload = {
'grant_type': 'client_credentials',
'client_id': client_id,
'client_secret': client_secret,
'scope': scope
}
headers = {
'Content-Type': 'application/x-www-form-urlencoded'
}
response = requests.post(url, data=payload, headers=headers)
response_data = response.json()
access_token = response_data['access_token']
token_value = f"Bearer {access_token}"
print("This is your access token:", token_value)
# Optionally, copy to clipboard if on a system with clipboard support
try:
import pyperclip
pyperclip.copy(token_value)
print("The access token is also copied to your clipboard so you can just ctrl+v it to your requests")
except ImportError:
print("pyperclip module not installed, cannot copy to clipboard.")

Using the access token in developer portal

Now you should have all the necessities for making the request also in the developer portal.

When working in the API browser with some endpoint, just hit "Try it button", then add your subscription-key into "Subscription key" part and then click "Add header", name it as "Authorization" and paste your access token with Bearer text in front as a value and you should be good to go!

Picture