How to get started with postman
Postman is a powerfull tool to test different APIs and plan you development project against our APIs.
Here is some help to get started with postman against our APIs
Getting started
After you have installed postman to your local machine, navigate into API listing to see what API’s are available here. For instance the Sales Invoicing (FI) API is public and specifications are available for everyone. Please note that some of the API’s might be visible only after the access has been granted by Talenom’s Customer Integrations team.
Importing Postman collection
After finding the API specifications from portal (Sales Invoicing in this case), the next step is to import it as a collection to Postman.
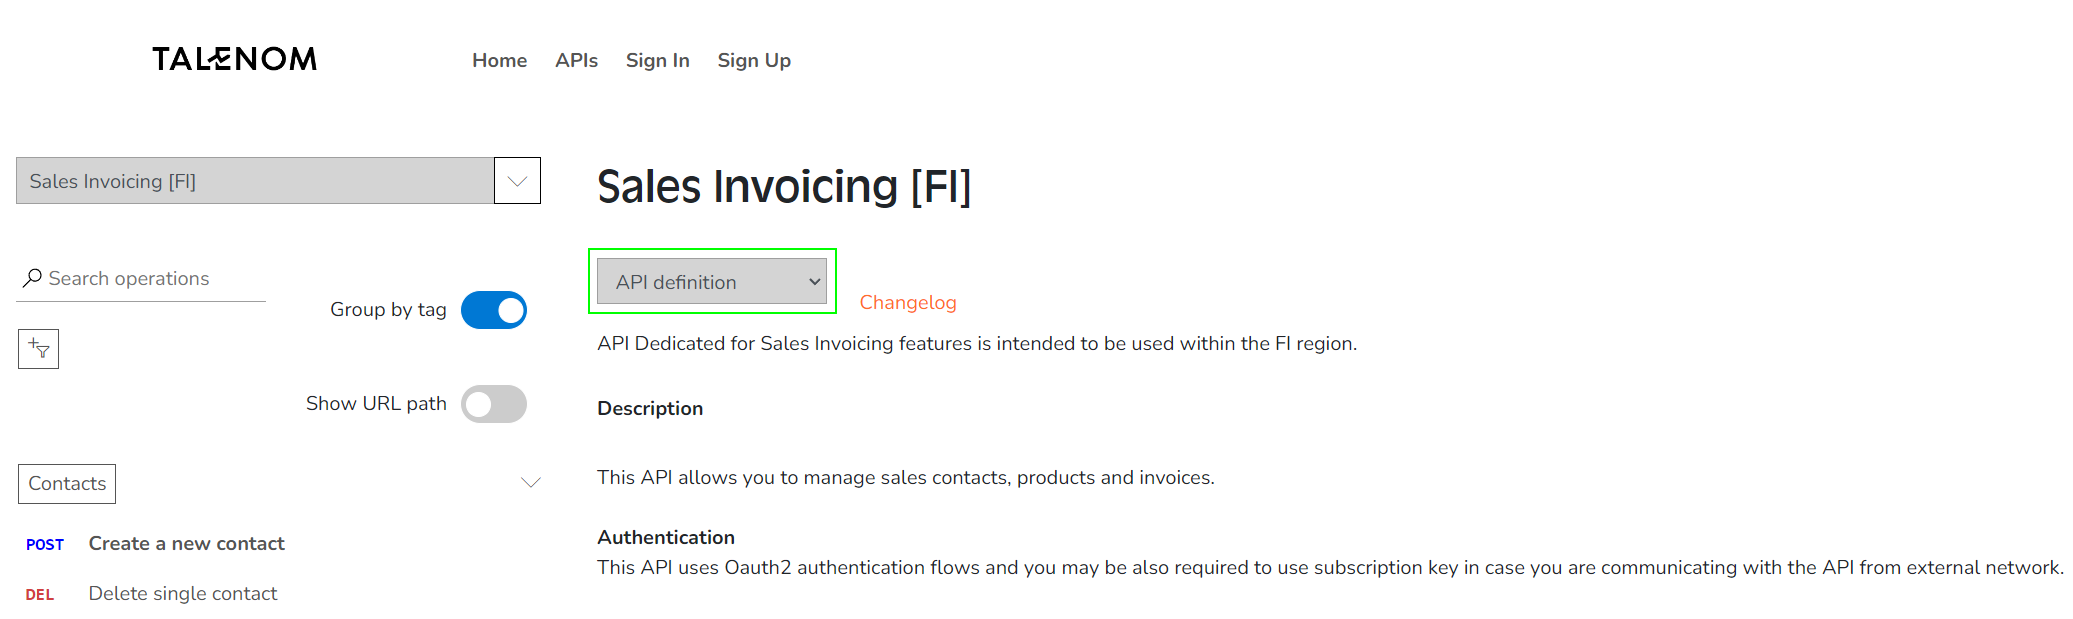
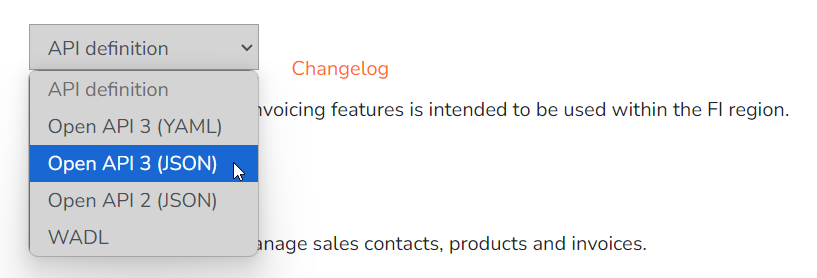
It can be done by downloading the JSON -file from the drop-down menu as "Open API 3 (JSON)".
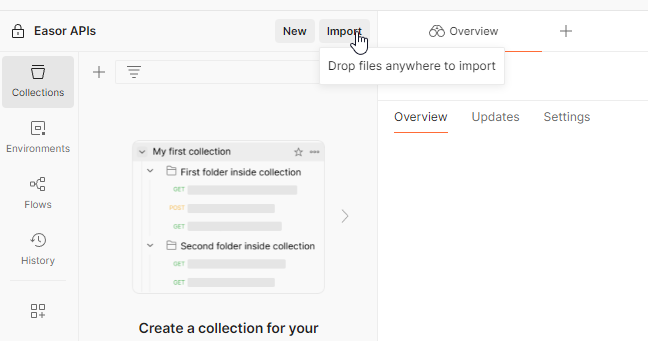
Open Postman, open "Collections" tab from left panel and then choose "Import" , then select the file you just downloaded
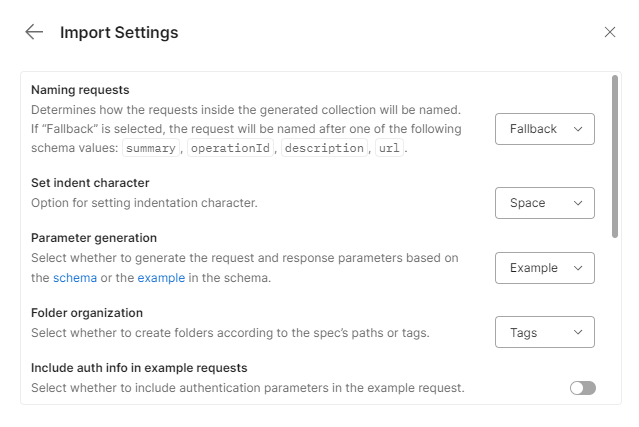
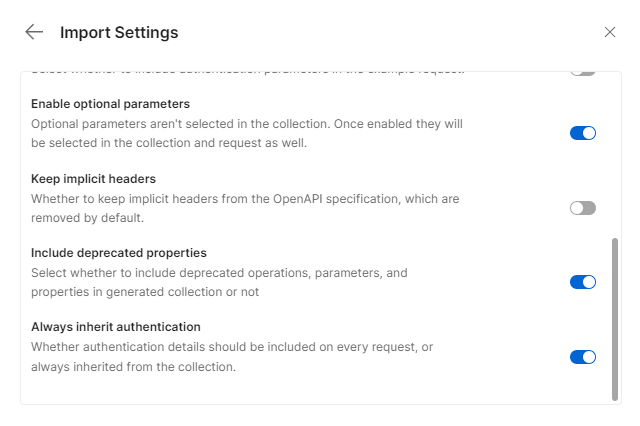
Next prompt will ask you to choose import settings, you can play around with those, but here is what we like
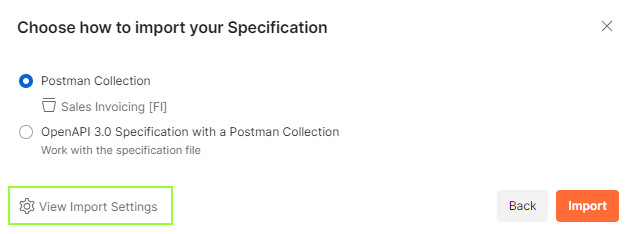
First part of settings
Second part of settings
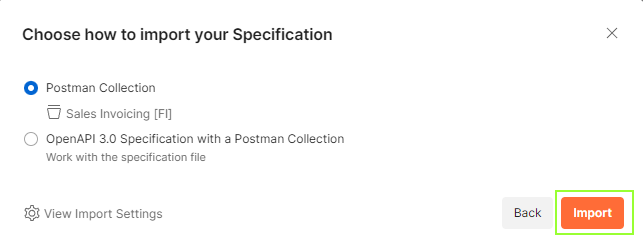
After you have selected your settings, click on the left arrow from top left corner and click on "Import"
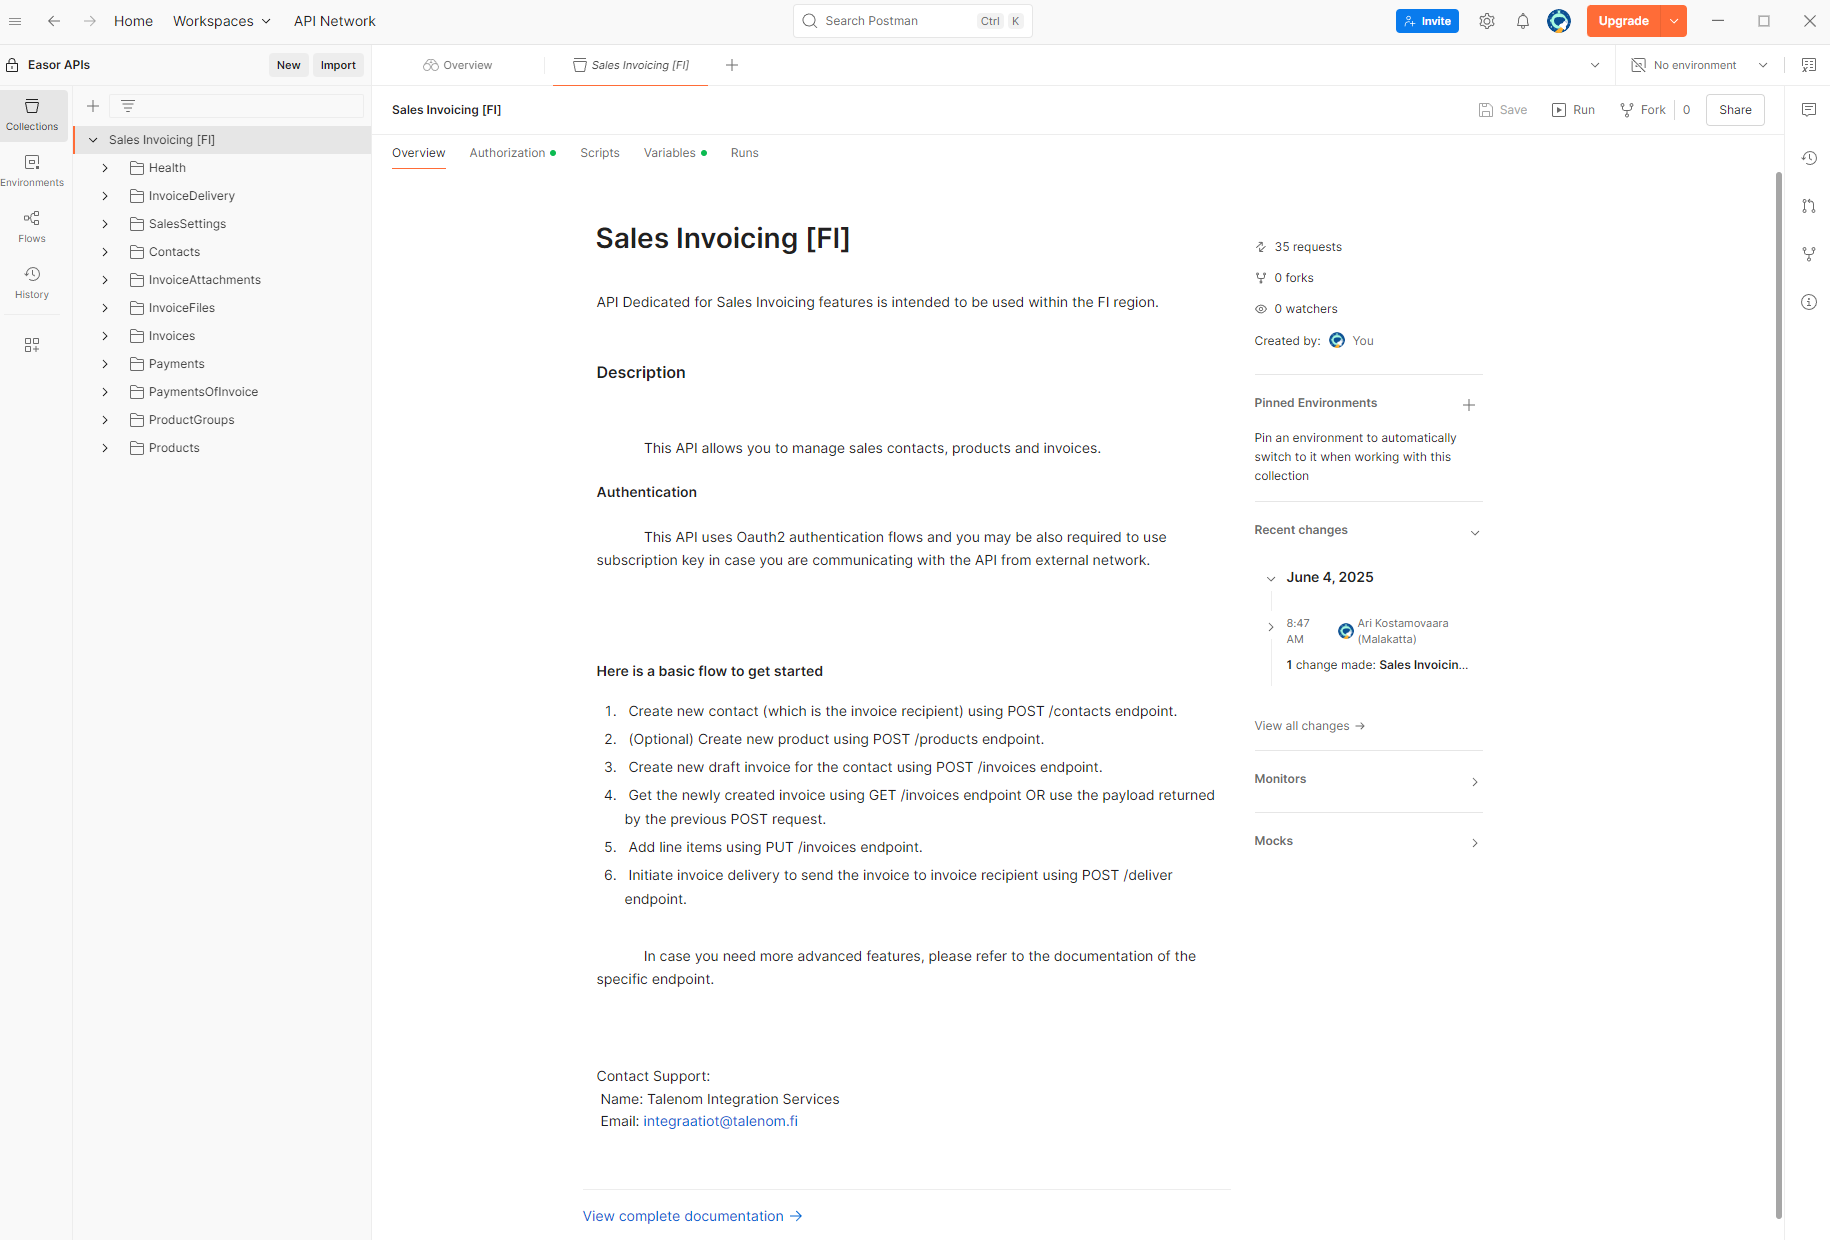
You have now imported the collection and should receive the following view after clicking the ‘Sales Invoicing [FI]’ header
Setting up environment variables
You won't be able to make requests directly because all our APIs require authentication and authorization.
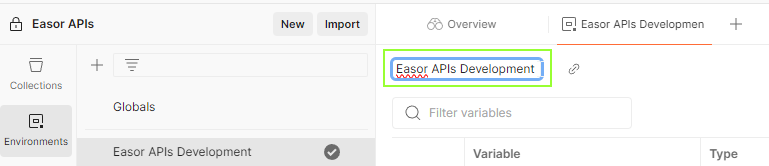
After you imported the collection, go to "Environments" tab in the side panel of Postman. You can either create a new environment or ask Talenom’s Integration team for environment template which you can import.
Let's create a minimum set of environment variables to get you going. After you have clicked on "New" under the environment tab, you can name it as you like.
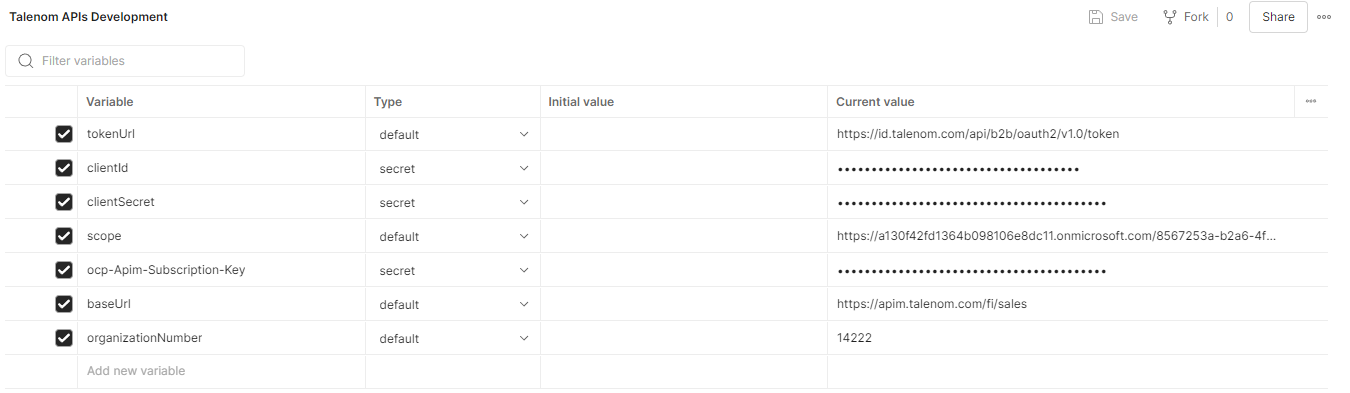
Now, create these variables in to the table in postman and fill in the values (which you have got from our integration support team) in to current value column
tokenUrl - This is the url where the access token is fetched during authentication
clientId - Client identifier (guid) is a username for your client
clientSecret - Client secret (string) is the password for your client
ocp-Apim-Subscription-Key - Subscripion key (string) is another secret which is validated during the API request
scope - Space-separated list of permissions (string) that defines what access the client is requesting on behalf of the user. In our case, this looks like an URL
organizationNumber - Also called as Customer number
baseUrl - Base URL to the API
After you have added the variables, remember to save before moving forward.
This is what it should look like
Setting up the Collection
Next, we will setup the collection so it uses the variables we just created
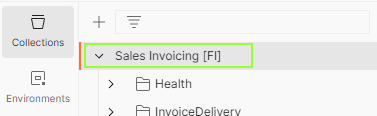
Switch to Collection tab in the left panel
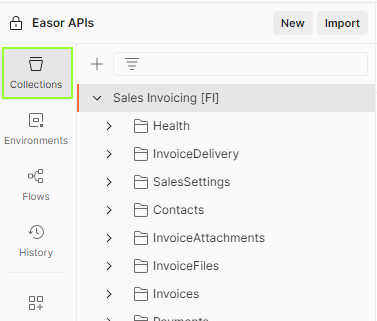
Select Sales Invoicing [FI]
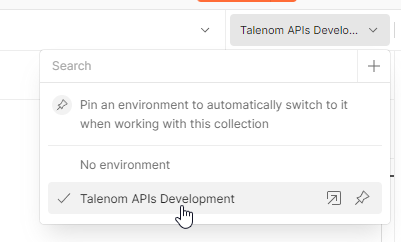
In top right corner, select the new environment which we just created
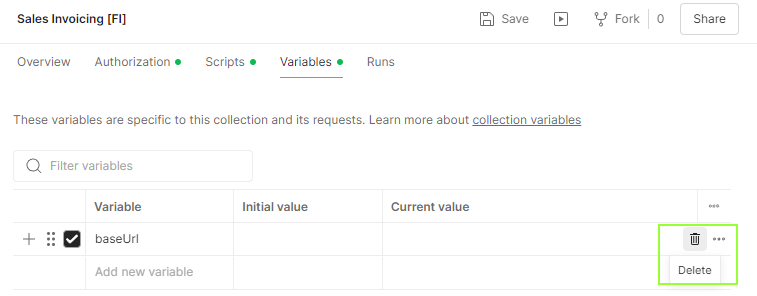
Check the Variables tab if you have some default variables set. There might be baseUrl/host that you can delete, since we are using the variables from Environment
To easily add Subscription key for every request, copy this script to ‘Pre-request’ in Scripts tab
pm.request.headers.add({key: 'Ocp-Apim-Subscription-Key',
value: pm.environment.get("ocp-Apim-Subscription-Key") });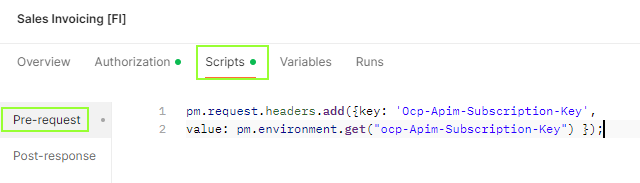
Remember to save every tab before moving on!
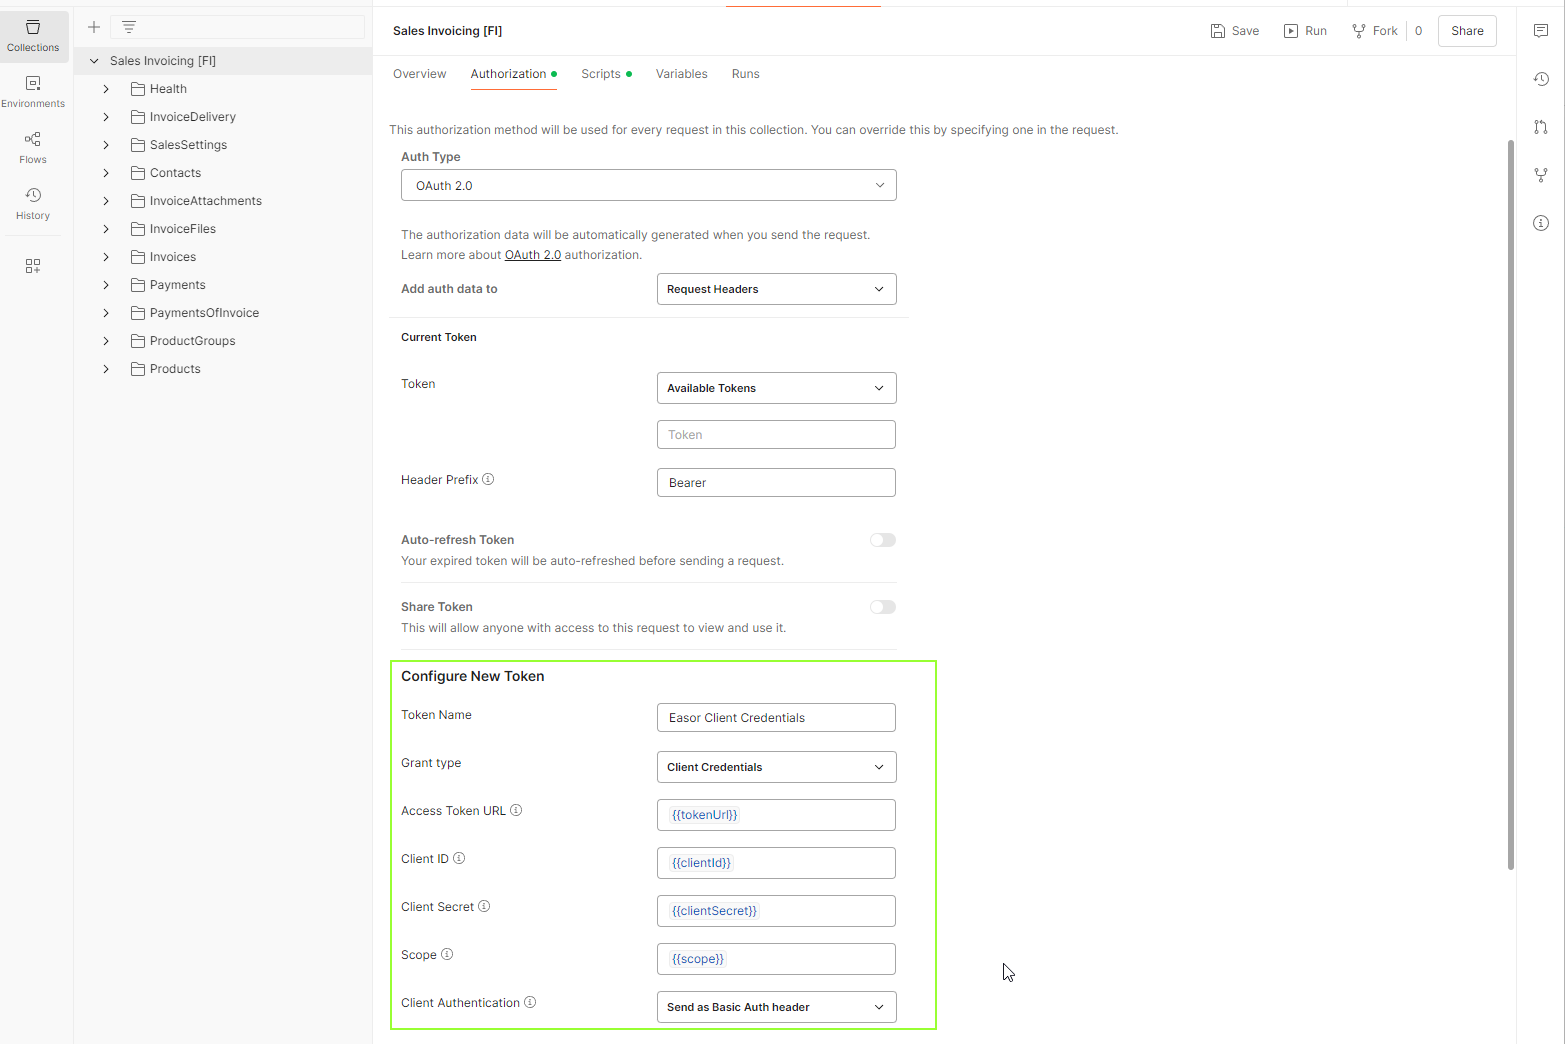
Next in line is the Authorization tab
Start by checking that the Auth Type chosen is ‘OAuth 2.0’.
Choose ‘Request Headers’ for Add auth data to -option.
Configure New Token
Switch Grant Type to ‘Client Credentials’ and link the variables from Environment as pictured below. Please note that spelling needs to be exact for linking to work as intended.
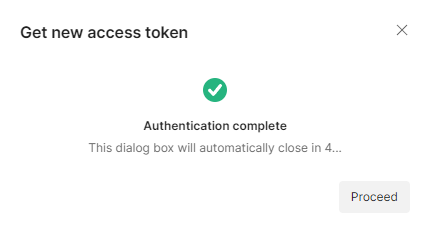
After you have done with configuring authorization, scroll down that same page and hit "Get New Access Token"

And if everything is setup correctly and you are using correct values, you should get pop-up telling that the Authentication is complete", click on proceed and in next screen "Use token" to use it in requests.
Sending the first request
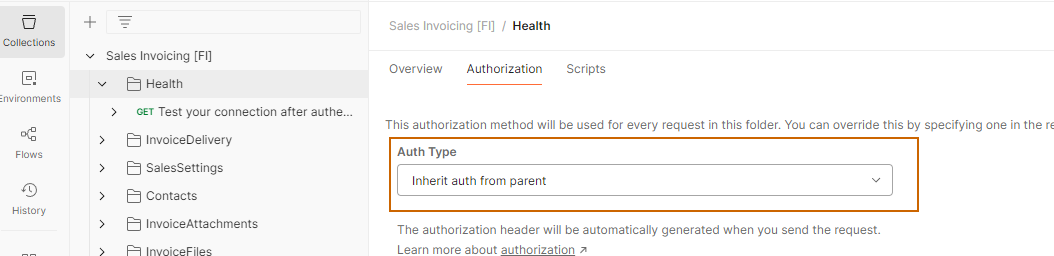
The Sales Invoicing API has a specific "Health" endpoint for easy check up to see if you can connect the API after authentication procedure.
In the left panel open up the "Health" folder and select the "Test your connection after authentication" endpoint, then modify the organizationNumber parameter so it takes the organization number from the environment variables.
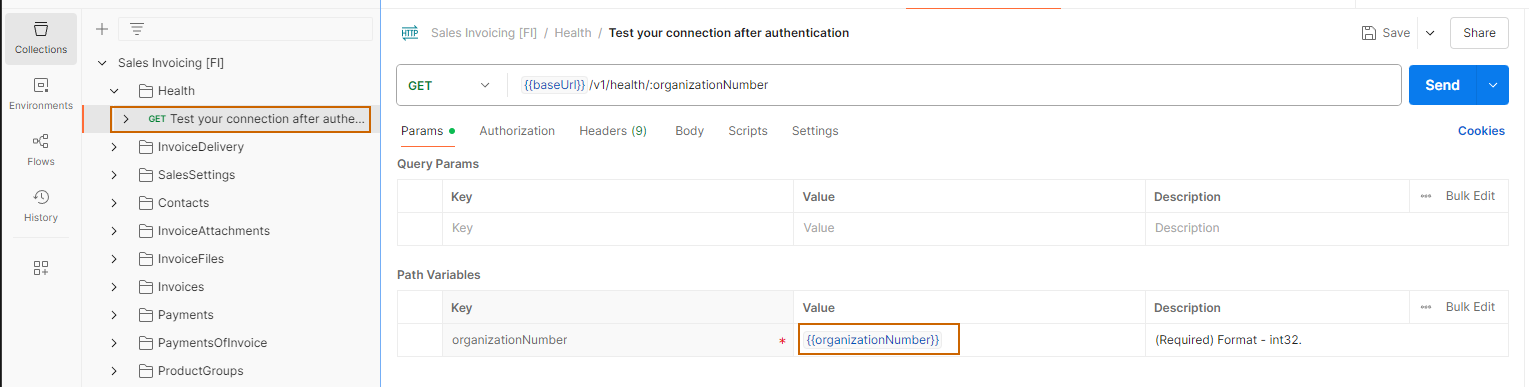
You can now test the request by clicking "Send" and if everything is correctly setup, you should get a response from the API, in case you get authentication error, check the Authorization tab from the Health folder and the request, those should use the same authentication as the collection, so there should be Auth type option "Inherit from parent" selected.
If the bottom part of the postman screen looks like this, you have done your first request to the API successfully!
